Vault Safety template revisions include changes to Vault configuration for general usability improvements. Template revisions are not automatically rolled out to existing customers.
New Vaults created in 21R3 or later will have the following settings by default. Vaults created in an earlier release can optionally be updated to match these changes. The sections on this page provide the instructions to enable these changes.
This page does not cover how to update your template to support new features. The What’s New in 21R3 page outlines which features require configuration upgrades, and provides links to enablement instructions for each feature.
Apply Relationship Security to Case and Transmission Document Fields
In the 21R3 template, the Case and Transmission document fields are secured to the referenced object record. The following steps outline how to configure this change in your Vault:
- Go to Configuration > Document Fields > Shared Fields.
- Select the Secure based on the states and roles of the referenced object records checkbox in the settings for the following fields:
- Case
- Transmission
- Go to Configuration > Object Lifecycles.
- In the Case Lifecycle (
case_processing_lifecycle__v), add relationship atomic security for following states:-
Closed
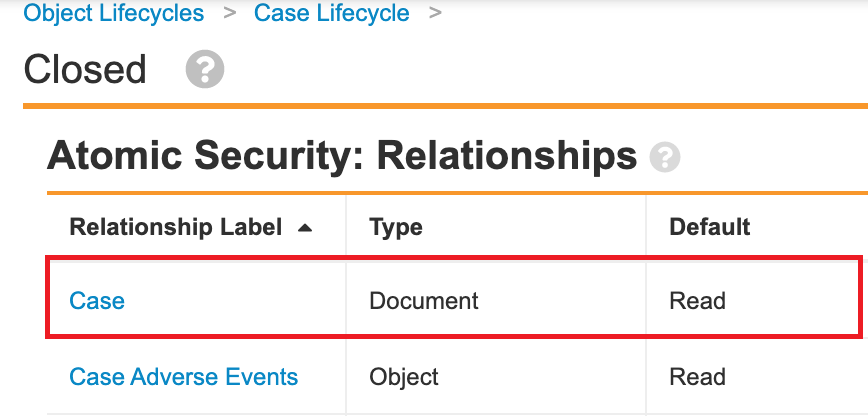
-
Superseded
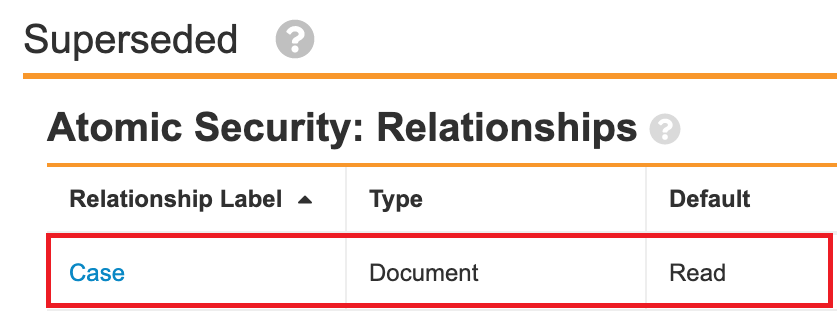
-
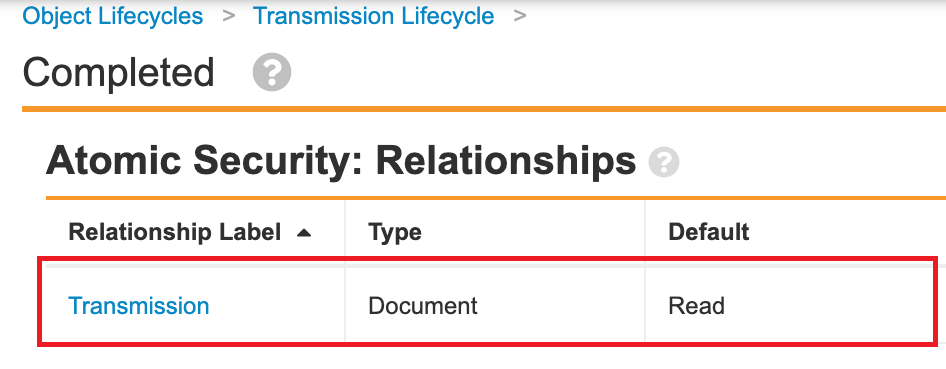
- In the Transmission Lifecycle (
transmission_lifecycle__v), add relationship atomic security for the Completed state:
Remove the AER Field from the Case Object Layout
In the 21R3 template, the AER field has been removed from the Case object layout.
Edit this layout from Configuration > Objects > Case > Layouts > Case Page Layout.
Note: AERs are in a sunset period, meaning they are being phased out. Using the new Inbox (Inbox Item) is currently optional but highly recommended due to the functional and usability benefits over the AER Inbox. All customers must use Inbox Items for intake by 23R3 (December 2023), when AER creation will be disabled.
Permission Set Updates for Case Drug History Substance
Grant permissions to the Case Drug History Substance object for the following standard Vault Safety Permission Sets:
| Permission Set | Object Permissions | Object Field Permissions |
|---|---|---|
| Case Distribution Manager | Read | Read on all fields |
| Case Entry Action |
|
|
| Case Intake Actions | Read | Read on all fields |
| Case Review Actions | Read | Read on all fields |
| Case Translation Actions | Read | Read on all fields |
| Safety Operations Actions | Read | Read on all fields |
| Safety Writer | Read | Read on all fields |
| Submission Actions | Read | Read on all fields |
Ensure Permission Sets Do Not Have Delete Permissions for Inbound Transmissions
We recommend that you ensure the following Permission Sets do not have delete permissions for the Inbound Transmission object type:
- Case Distribution Actions
- Case Entry Actions
- Case Intake Actions
- Case Review Actions
- Case Translation Actions
Manage Permission Sets in the Admin area from Users & Groups > Permission Sets.
Allow Promote to Case from New Inbox Item
The 21R3 Vault Safety template is updated to allow users to promote Inbox Items to Case directly from the new state. Previously, these actions were only available in the Verification state.
This configuration is documented on the following enablement instructions article:
Do Not Copy Source MedDRA Version Field
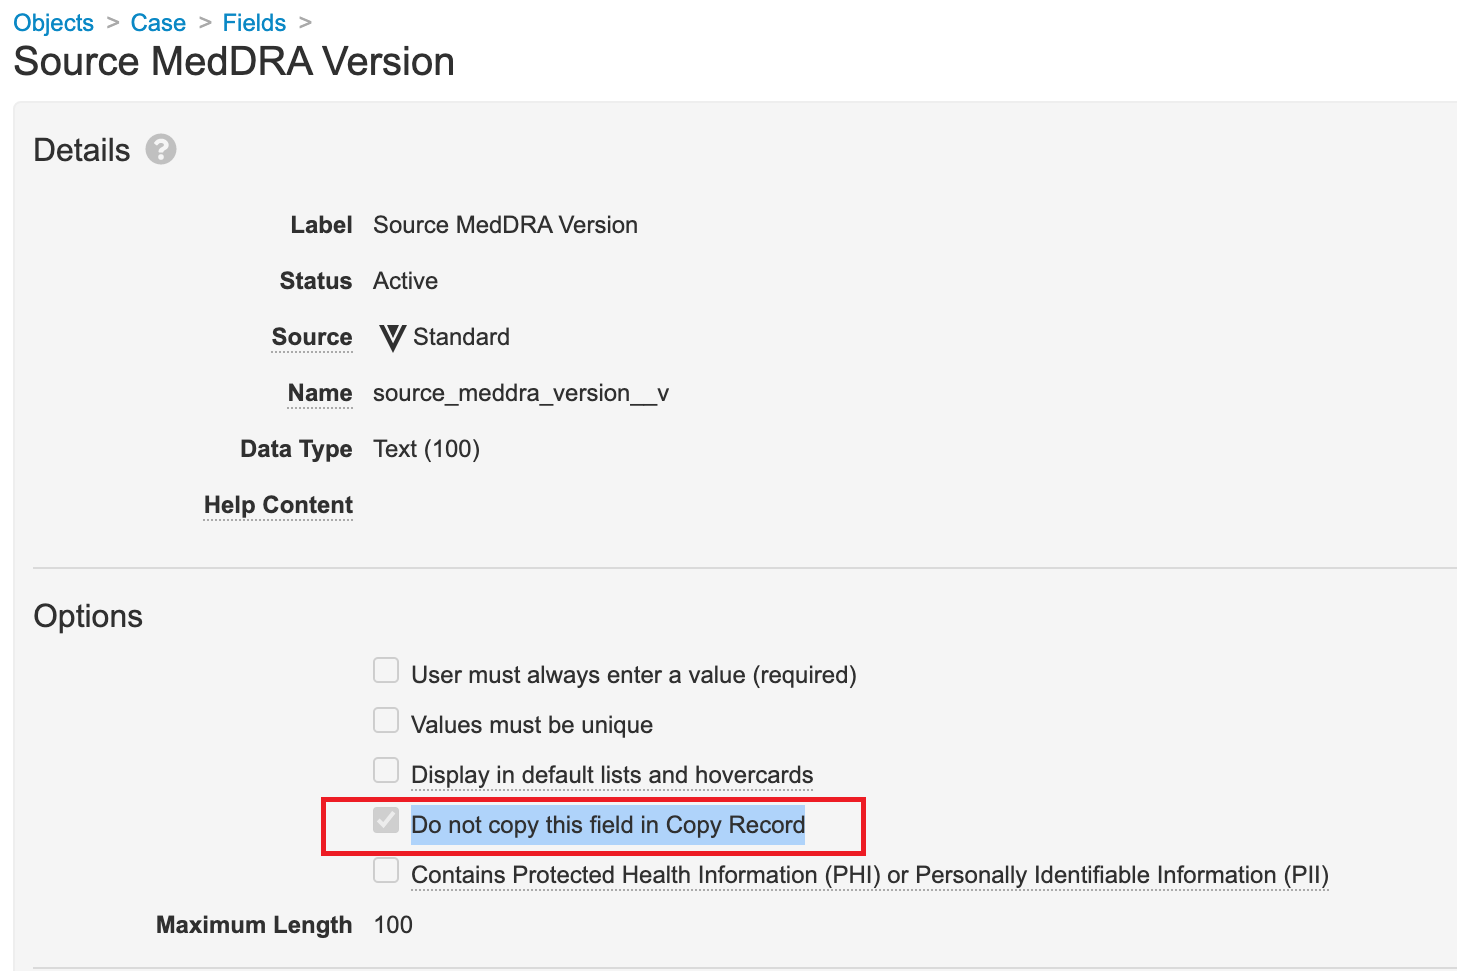
Ensure the Do not copy this field in Copy Record checkbox is selected for the Case > Source MedDRA Version (source_meddra_version__v) field. This configuration fixes an issue where manually created follow-ups to E2B Imported Cases skip the Data Entry workflow stage.
- Go to Configuration > Objects > Case.
- From the Fields tab, open the Source MedDRA Version field for editing.
- Select the Do not copy this field in Copy Record checkbox.
Add User Actions to Withdraw Submissions and Distributions
In the 21R3 template, user actions are added to allow users to move Submissions and Distributions to a Withdrawn state. Transmissions that are in the Withdrawn state will be excluded from PADER reports.
Add a User Action to Withdraw a Record
- In the Admin area, go to Configuration > Object Lifecycles.
- Open the Transmission Lifecycle.
- Under States, open the Pending and Active states for editing.
- In each state, beside User Actions, select Edit.
- Select Add Action, and then add an action to Change State to Withdrawn.
- Select Save.
Add a User Action to Reactivate a Record
- In the Admin area, go to Configuration > Object Lifecycles.
- Open the Transmission Lifecycle.
- Under States, open the Withdrawn state.
- On the Withdrawn page, beside User Actions, select Edit.
- Select Add Action, and then add an action to Change State to Active.
- Select Save.
Localized Case Permissions
The 21R3 template has been updated with additional permissions for objects related to Localized Case processing.
- Go to Users & Groups > Permission Sets.
- Open the Objects tab.
- Ensure permissions are granted to object types and fields according to the following table:
| Permission Set | Field or Object Type | Permission |
|---|---|---|
| Case Distribution Actions | Case Product Registration > Japan (Object Type) | Read |
| Case Distribution Actions | Case Product Registration > All Fields | Read |
| Case Distribution Actions | Case Product Registration > Base Case Product Registration (Object Type) | Read |
| Case Entry Actions | Case Product Registration > Japan (Object Type) | Create |
| Case Entry Actions | Case Product Registration > All Fields |
|
| Case Entry Actions | Case Product Registration > Base Case Product Registration (Object Type) | Read |
| Case Distribution Actions | Transmission > Localized Case (Field) | Edit |
| Case Distribution Actions | Transmission > Case (Field) | Edit |
Blind Protection on Localized Case
The following sections describe configuration added to the 21R3 template for blind protection on Localized Cases. Implement this configuration if your organization uses Localized Cases to process or translate Study Cases that require blinding.
Localized Case
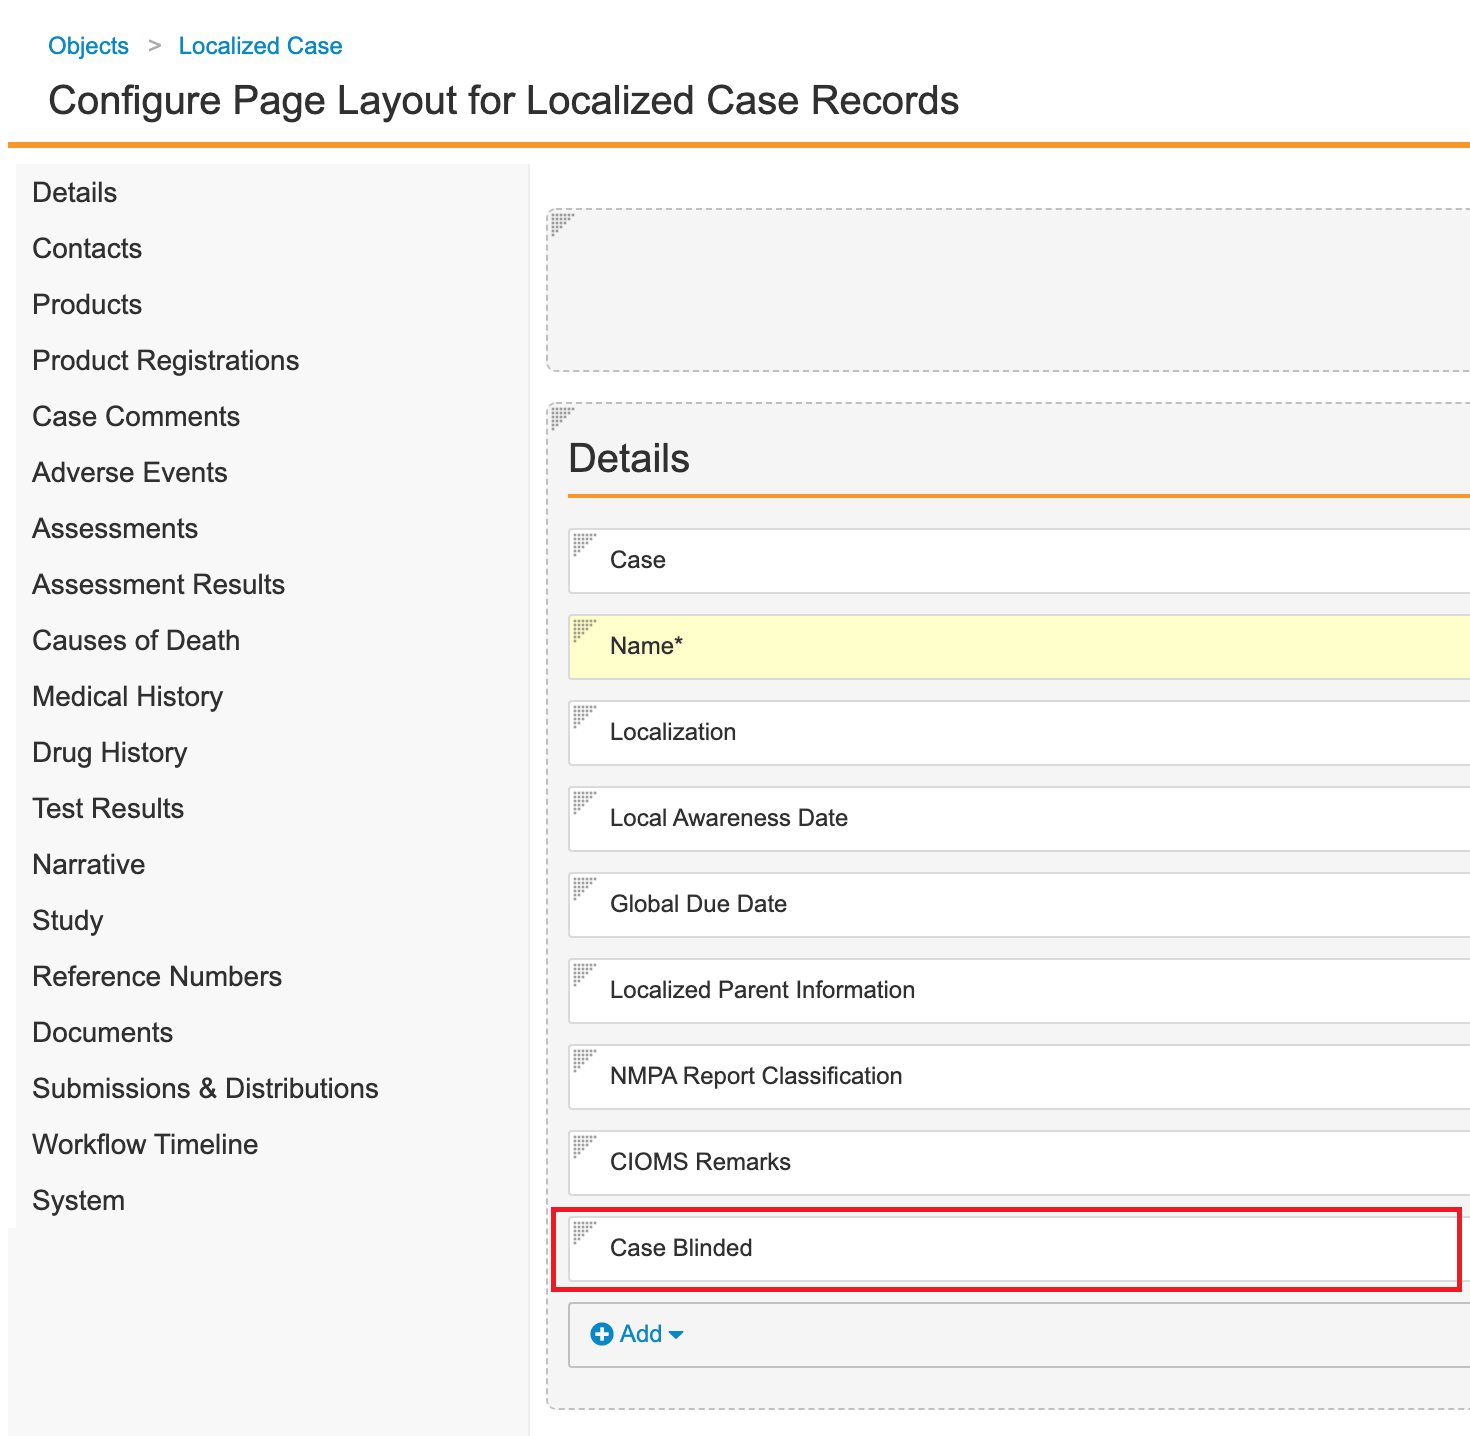
- Go to Configuration > Objects > Localized Case.
- Add the Case Blinded field:
- Open the Fields tab.
- Select Create.
- Specify the following details for the field:
- Field type: Lookup
- Label: Case Blinded
- Name:
case_blinded__c - Lookup Relationship: Case (
case__vr) - Lookup Source Field: Case Blinded
- Add the Case Blinded field to the Details section of the Localized Case Page Layout:
Localized Case Assessment
- Go to Configuration > Objects > Localized Case Assessment.
- Add the Blind Protection field:
- Open the Fields tab.
- Select Create.
- Specify the following details for the field:
- Field type: Lookup
- Label: Blind Protection
- Name:
blind_protection__c - Lookup Relationship: Case (
case__vr) - Lookup Source Field: Blind Protection
- Remove the Blind Protection field from the Localized Case Assessment Page Layout.
- Update sharing rules for the following roles to match on Organization and Blind Protection:
- Distribution Manager
- Data Entry
- Translator
- QC
- Intake
- Medical Coder

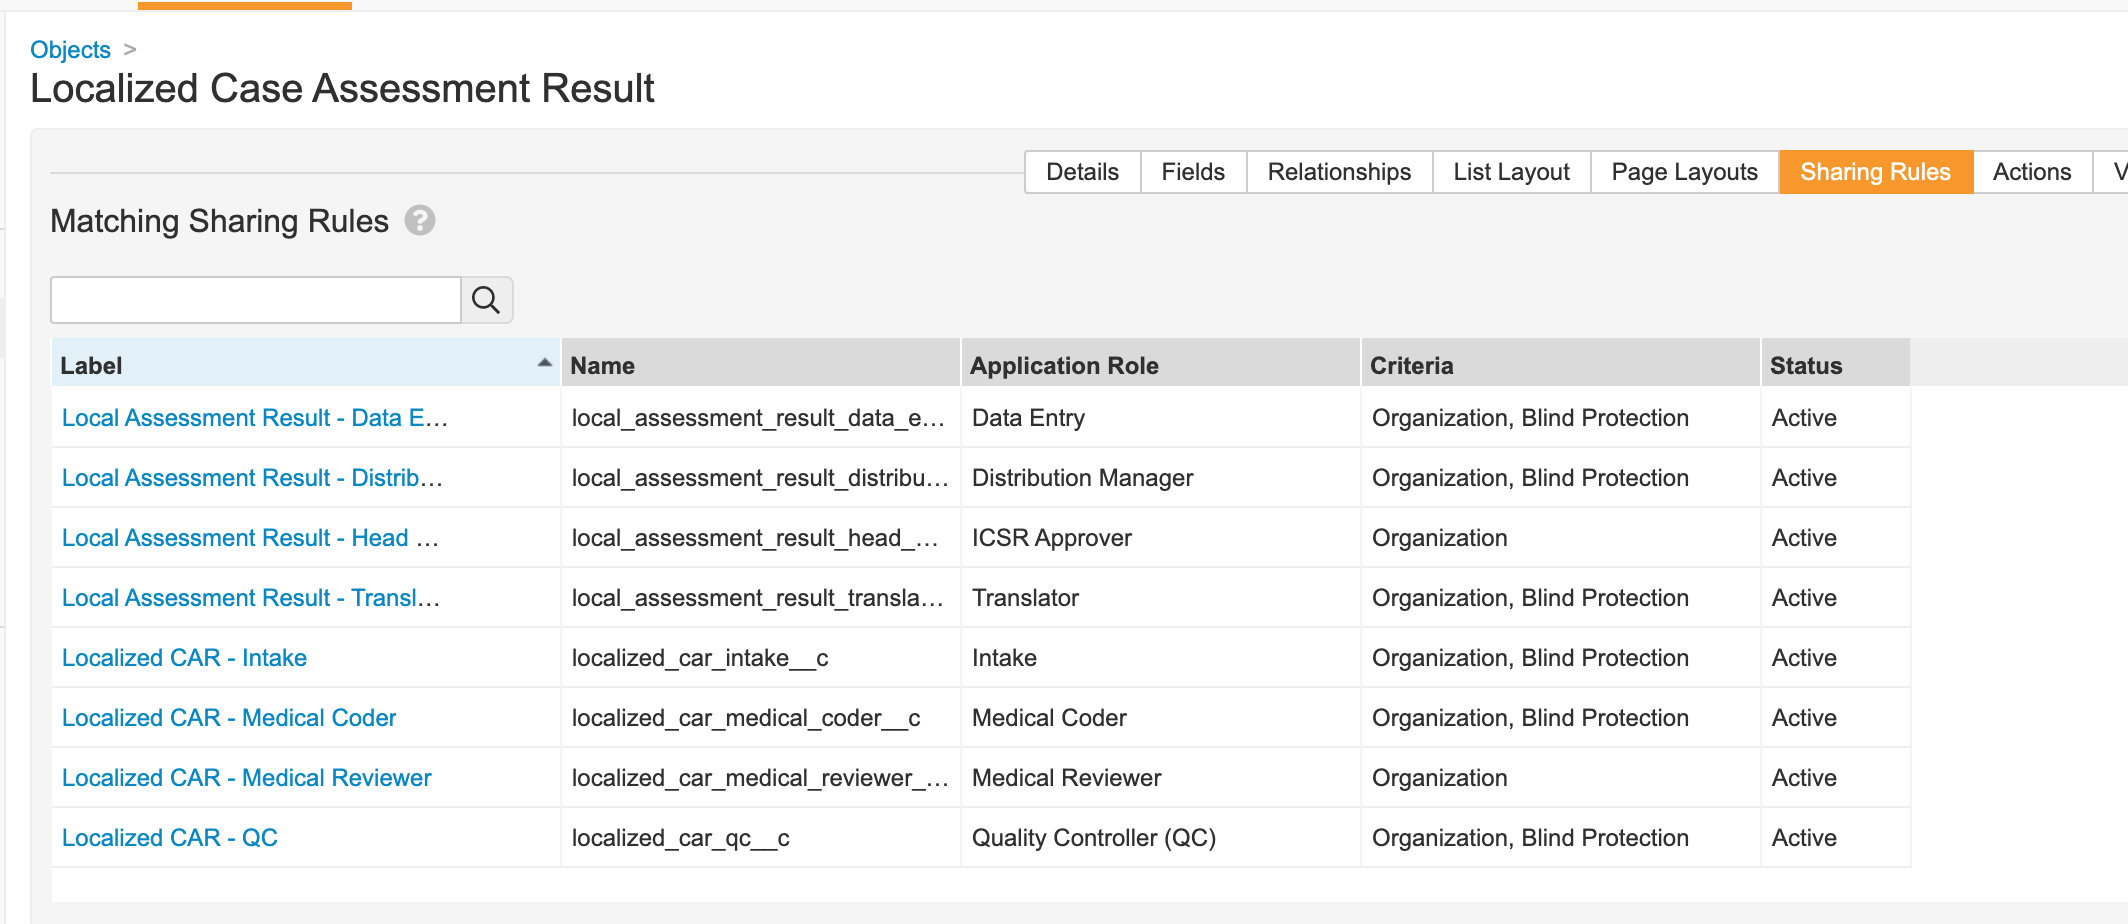
Localized Case Assessment Result
- Go to Configuration > Objects > Localized Case Assessment Result.
- Add the Blind Protection field:
- Open the Fields tab.
- Select Create.
- Specify the following details for the field:
- Field type: Lookup
- Label: Blind Protection
- Name:
blind_protection__c - Lookup Relationship: Case (
case__vr) - Lookup Source Field: Blind Protection
- Remove the Blind Protection field from the Localized Case Assessment Result Page Layout.
- Update sharing rules for the following roles to match on Organization and Blind Protection:
- Distribution Manager
- Data Entry
- Translator
- QC
- Intake
- Medical Coder
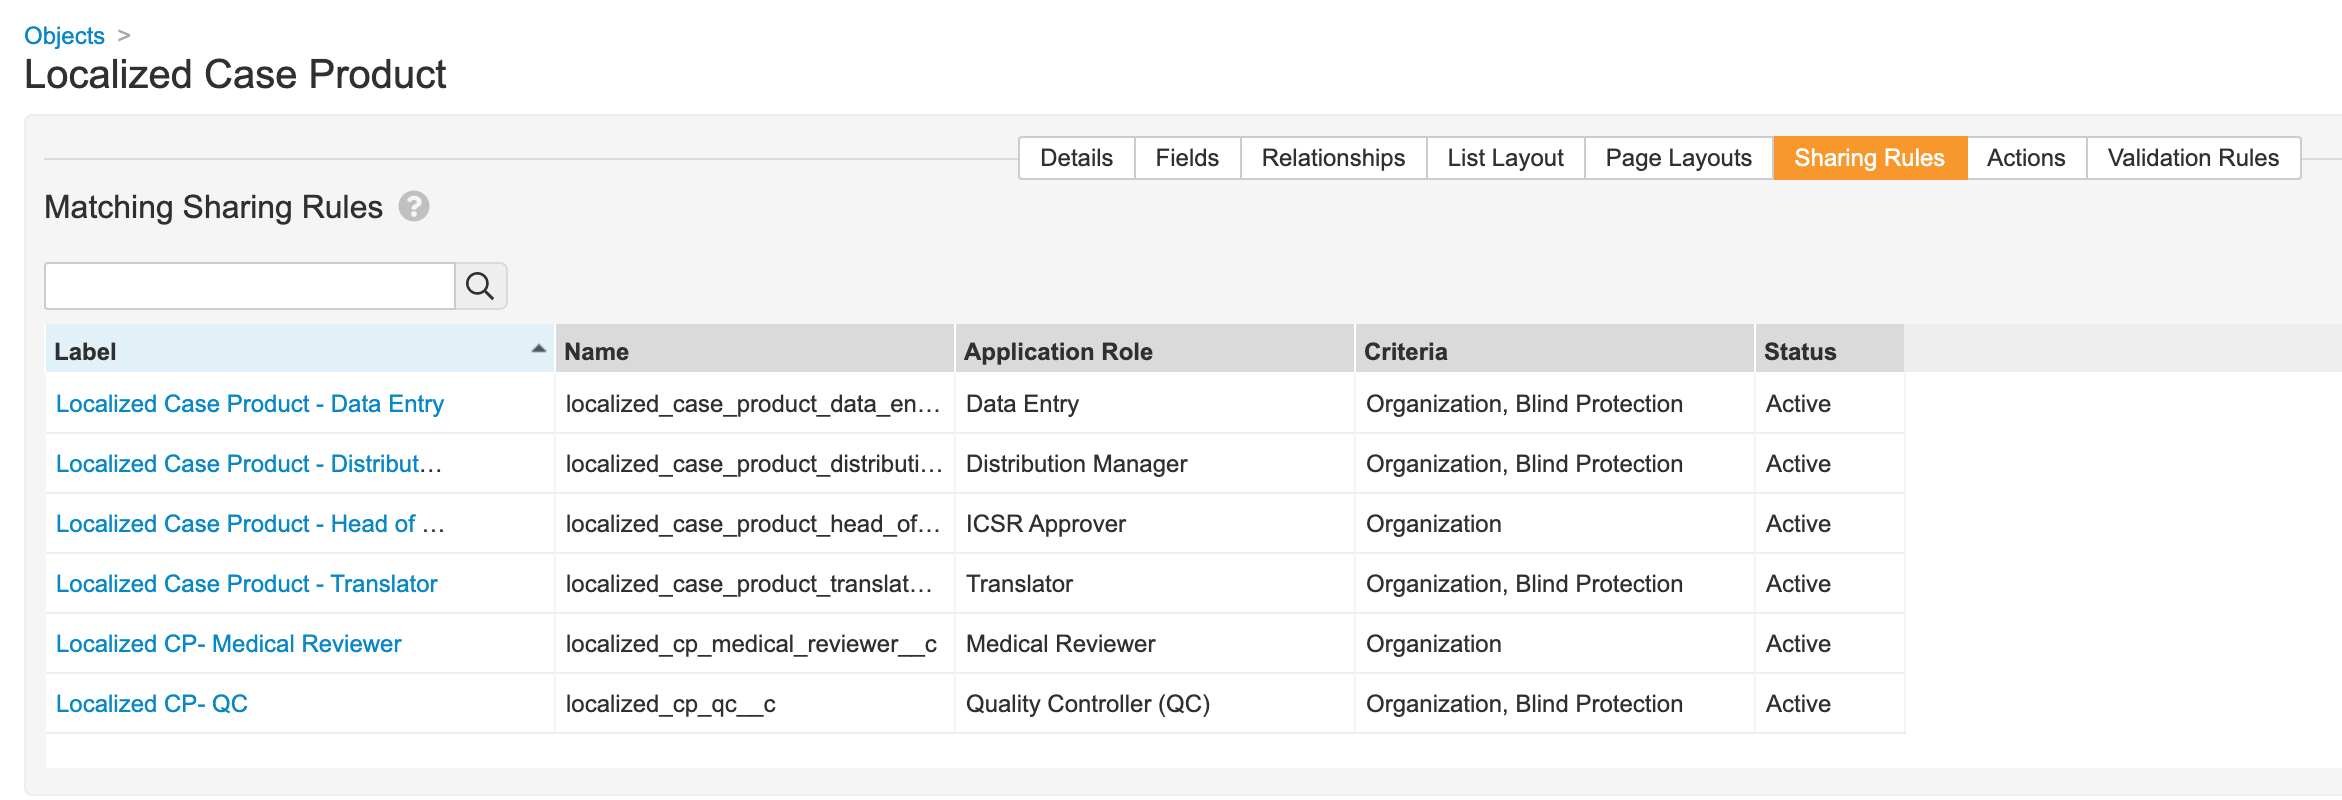
Localized Case Product
- Go to Configuration > Objects > Localized Case Product.
- Add the Blind Protection field:
- Open the Fields tab.
- Select Create.
- Specify the following details for the field:
- Field type: Lookup
- Label: Blind Protection
- Name:
blind_protection__c - Lookup Relationship: Case (
case__vr) - Lookup Source Field: Blind Protection
- Remove the Blind Protection field from the Localized Case Product Page Layout.
- Update sharing rules for the following roles to match on Organization and Blind Protection:
- Distribution Manager
- Data Entry
- Translator
- QC
- Intake
Localized Case Product Dosage
- Go to Configuration > Objects > Localized Case Product Dosage.
- Add the Blind Protection field:
- Open the Fields tab.
- Select Create.
- Specify the following details for the field:
- Field type: Lookup
- Label: Blind Protection
- Name:
blind_protection__c - Lookup Relationship: Case (
case__vr) - Lookup Source Field: Blind Protection
- Remove the Blind Protection field from the Localized Case Product Dosage Page Layout.
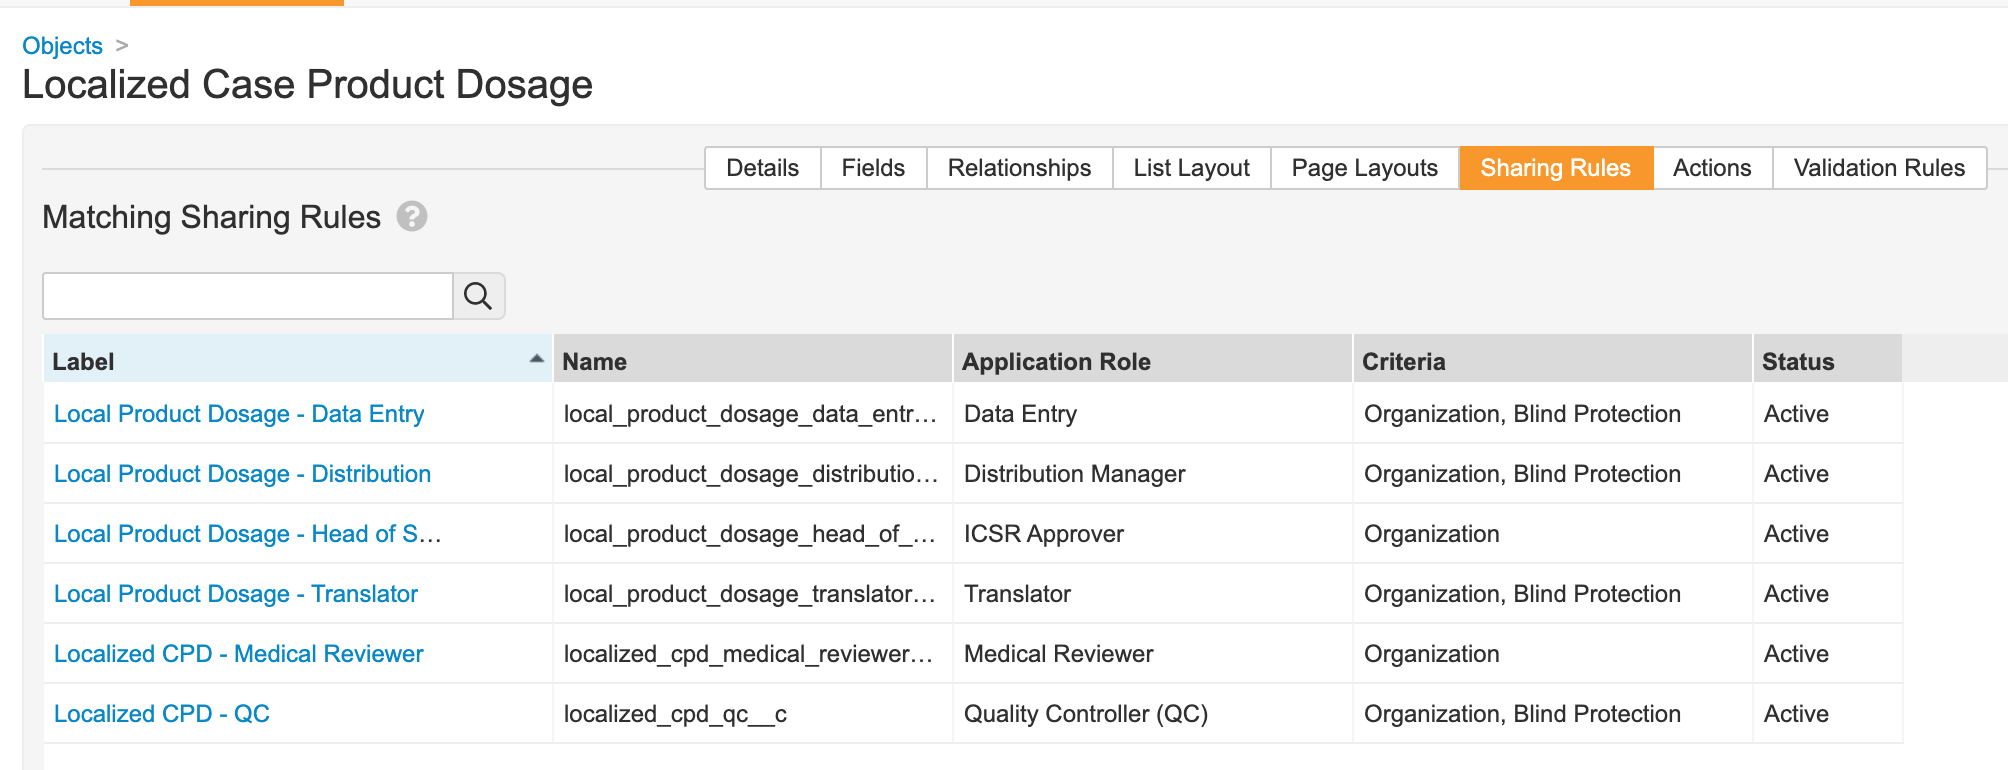
- Update sharing rules for the following roles to match on Organization and Blind Protection:
- Distribution Manager
- Data Entry
- Translator
- QC
- Medical Coder
Localized Case Product Substance
- Go to Configuration > Objects > Localized Case Product Substance.
- Add the Blind Protection field:
- Open the Fields tab.
- Select Create.
- Specify the following details for the field:
- Field type: Lookup
- Label: Blind Protection
- Name:
blind_protection__c - Lookup Relationship: Case (
case__vr) - Lookup Source Field: Blind Protection
- Remove the Blind Protection field from the Localized Case Product Substance Page Layout.
- Update sharing rules for the following roles to match on Organization and Blind Protection:
- Distribution Manager
- Data Entry
- Translator
- QC
- Medical Coder

See All Open Action Items Report
The Vault Safety 21R3 template adds a multi-pass report and web action to allow users to see all Action Items across Case versions. The following sections outline the nine steps to add this configuration to your Vault.
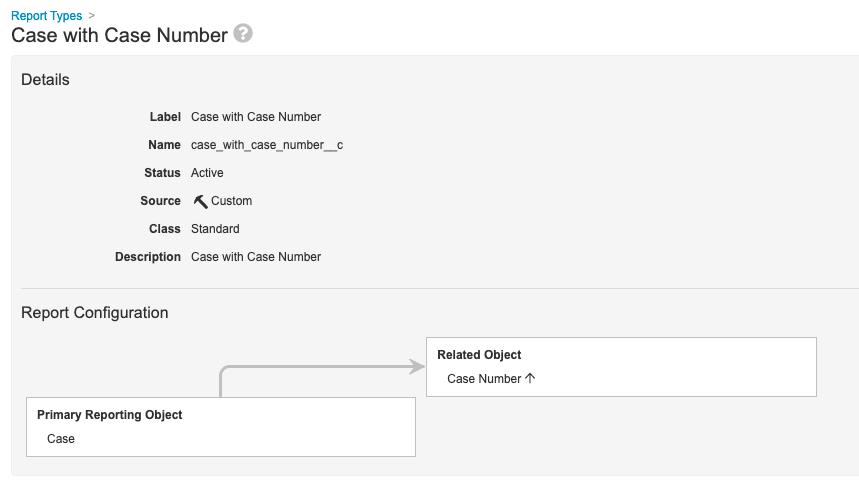
Step 1: Add Case With Case Number Report Type
- Go to Configuration > Report Types.
- Create a report type with the following settings:
| Setting | Value |
|---|---|
| Label | Case with Case Number |
| Primary Reporting Object | Case |
| Related Object | Case Number |
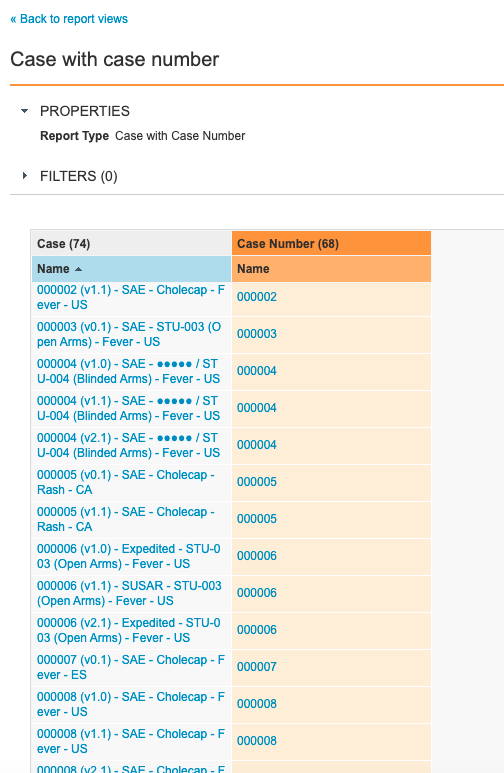
Step 2: Add Case With Case Number Report View
- Go to Configuration > Report Views.
- Create a report view with the following settings:
| Setting | Value |
|---|---|
| Label | Case with Case Number |
| Report Type | Case with Case Number |
| Columns |
|
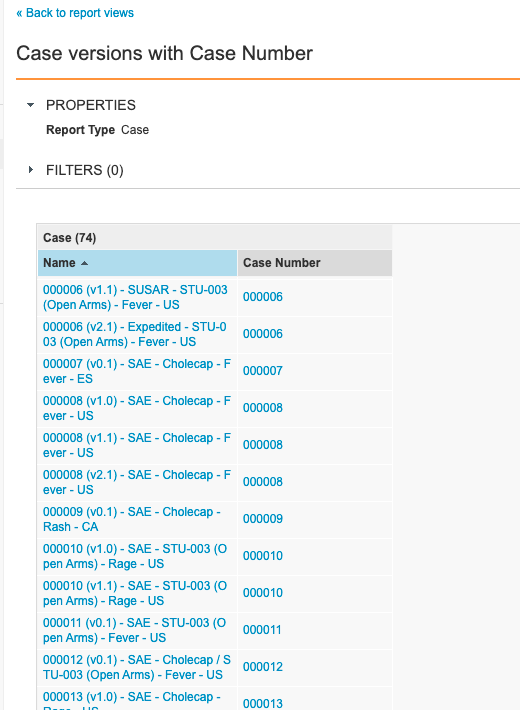
Step 3: Add Case Versions With Case Number Report View
- Go to Configuration > Report Views.
- Create a report view with the following settings:
| Setting | Value |
|---|---|
| Label | Case Versions with Case Number |
| Report Type | Case |
| Columns |
|
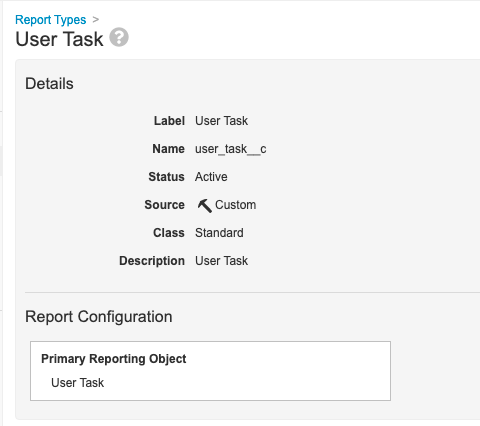
Step 4: Add User Task Report Type
- Go to Configuration > Report Types.
- Create a report type with the following settings:
| Setting | Value |
|---|---|
| Label | User Task |
| Primary Reporting Object | User Task |
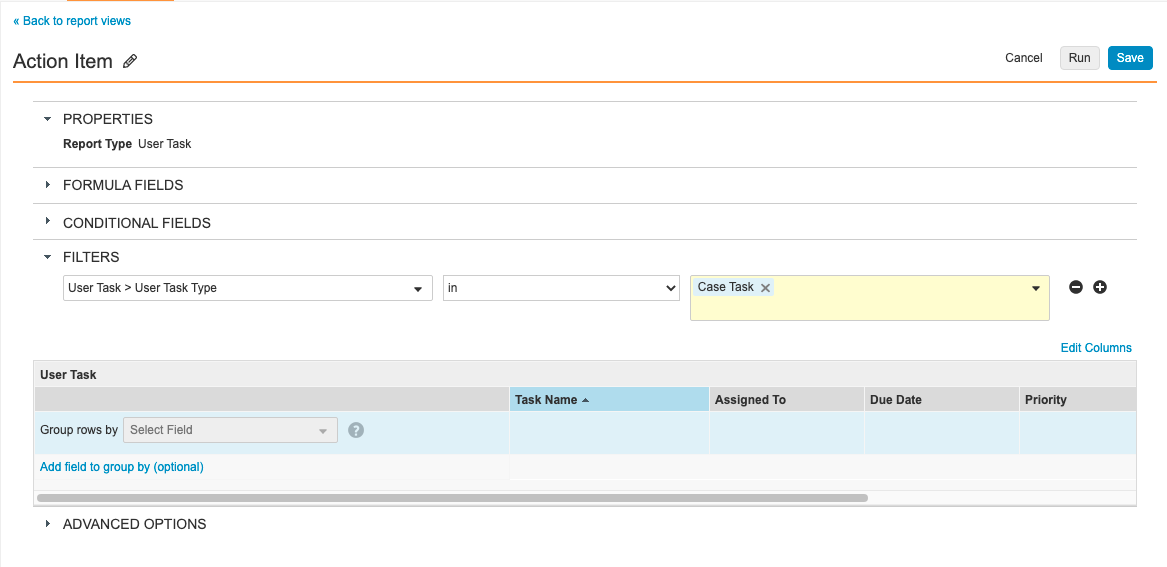
Step 5: Add Action Item Report View
- Go to Configuration > Report Views.
- Create a report view with the following settings:
| Setting | Value |
|---|---|
| Label | Action Item |
| Report Type | User Task |
| Filters | User Task > User Task Type in Case Task |
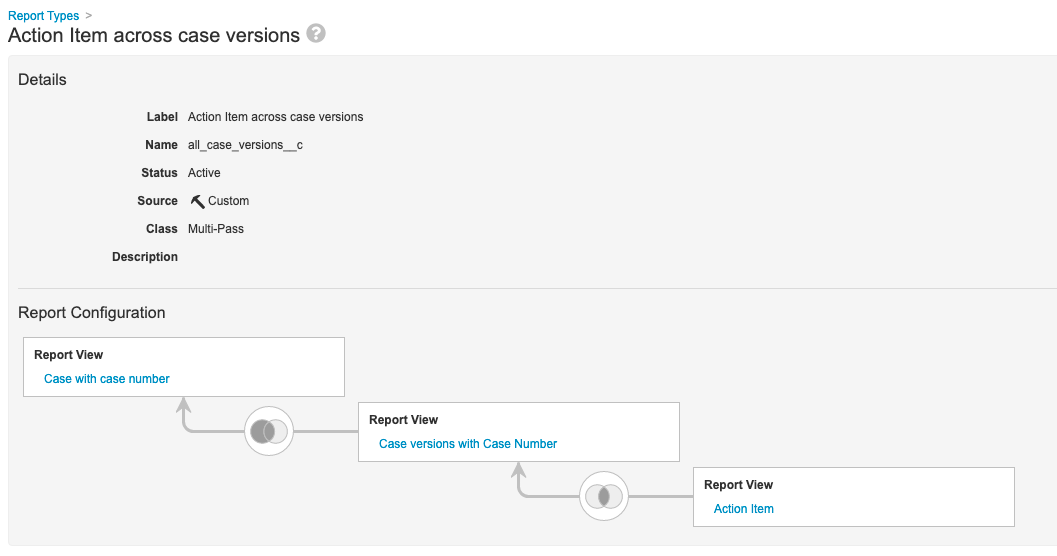
Step 6: Add Action Item Across Case Versions Multi-Pass Report
- Go to Configuration > Report Types.
- Create a report type with the following settings:
| Setting | Value |
|---|---|
| Label | Action Item Across Case Versions |
| Class | Multi-Pass |
| Report View | Case with Case Number |
| Left Join | Case Versions with Case Number |
| Inner Join | Action Item |
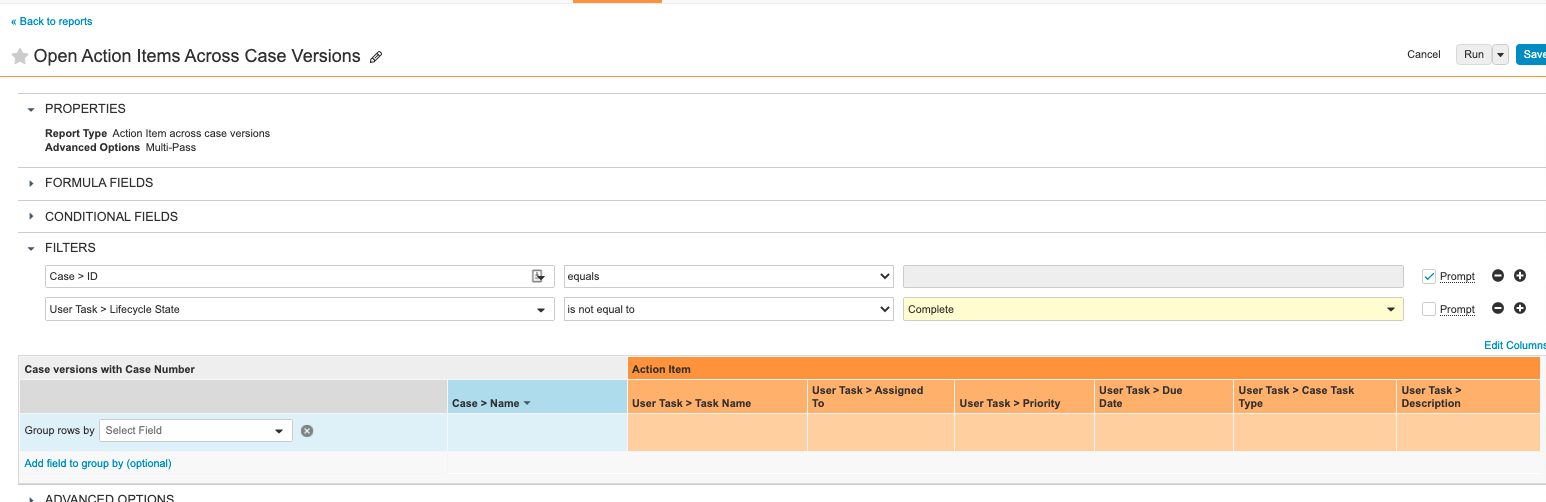
Step 7: Add Open Action Items Across Case Versions Report
- From Vault, go to the Reports tab.
- Add a report with the following settings:
| Setting | Value |
|---|---|
| Label | Open Action Items Across Case Versions |
| Report Type | Action Item Across Case Versions |
| Filters |
|
| Columns |
|
Step 8: Add Web Action to Pull Report
- Go to Configuration > Web Actions.
- Create a web action to pull the Action Items Across Case Versions report and populate the current Case ID.
Note: The report ID in the screenshot below (0RP00000000006005) will vary in each Vault. Please confirm the report ID in your Vault when configuring the user action

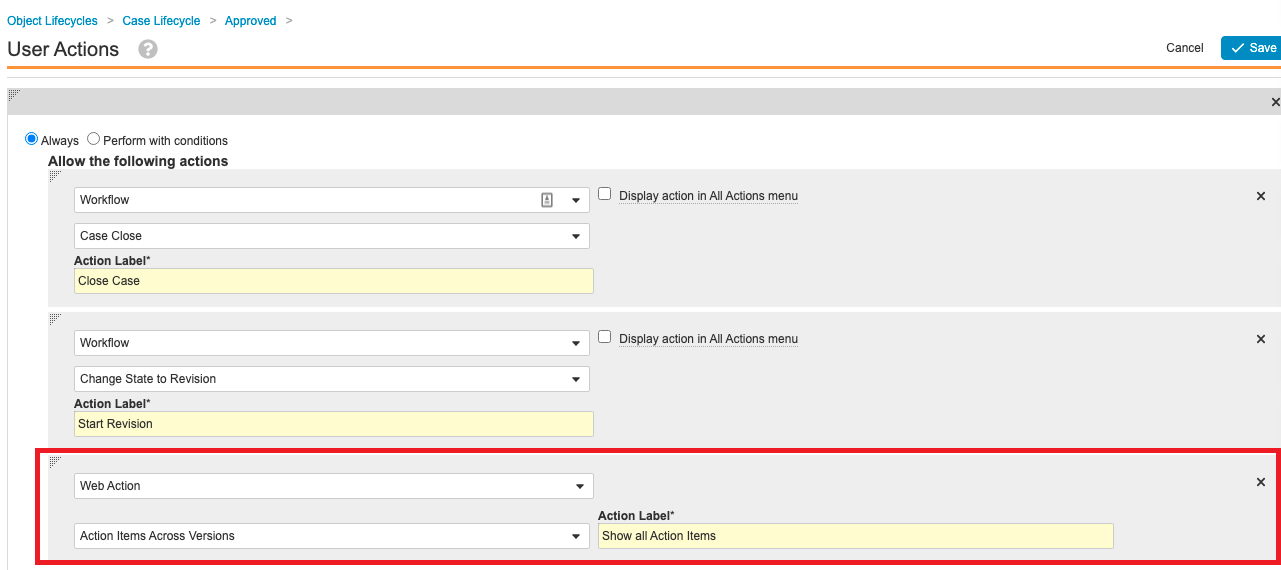
Step 9: Add User Action to Case Lifecycle
- Go to Configuration > Object Lifecycles > Case Lifecycle.
- Add a user action to execute the Action Items Across Case Versions web action to the following states:
- Approved
- Closed
- Data Entry
- Medical Review
- QC
- Revision